12/07/2016
10/29/2016
5/01/2016
4/14/2016
Apr 14, 2016 at 2:54 PM subject: Re: [Star45] Masts and Rig
| bret anderson bretanderson0088@yahoo.com [Star45] <Star45@yahoogroups.com> posted |
When I was building mine, I found parts here as well
http://www.leadingedgehobbies.com/webstore/wecs.php?store=leading&action=category_view&target=1470
Plus, the Miami valley model yacht club has some good resources for making parts.
https://sites.google.com/site/mvmyclub/resources
4/13/2016
[Star45] CT - Brook Lake in Middlebury, CT sailhmyc.com
[Star45]
Hi Al,
I am secretary of the Housatonic Model Yacht Club. We sail at Hop Brook Lake in Middlebury, CT ( exit 17 off I84). We race form late May to early September. We sail four classes: Star 45, Soling 1M, SeaWind and US1M. Our club has been around for over 30 years.Our website is sailhmyc.com Sign on and "check us out."
Mary Goebel (Sail #171)
HMYC
11/08/2015
The Star 45 is a one design class of model yachts
PondYachtworks in Scottsdale, AZ.

American Model Yachting Association Star 45 Class

The Star 45 is a one design class of model yachts recognized by the American Model Yacht Association. This boat is 45" long with a minumum weight of 12 pounds. The design is a semiscale model of a International Star. These boats can be scratchbuilt, from a kit or purchased complete.
11/07/2015
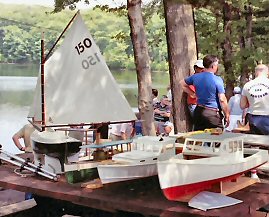
Dave Mainwaring's Friendship Sloop, built Jan 1950 on left, Dave's 42 inch lobster boat on right 2000399
Posted by Hello
What is a hull ? and construction categories
Dave Mainwaring's definitions
HULL defintion of:
The outer shell, including frames, ribs, interior bulkheads, exclusive of masts, rigging, deck and equipment.
"bare hull" defintion of:
A model boat's outer shell, EXCLUDING, ribs, interior bulkheads, exclusive of masts, rigging, deck and equipment. Example. A fiberglass hull as pulled from a mold.
--
A wooden hull:
one constructed of wood (including plywood).
--
--
HULL defintion of:
The outer shell, including frames, ribs, interior bulkheads, exclusive of masts, rigging, deck and equipment.

"bare hull" defintion of:
A model boat's outer shell, EXCLUDING, ribs, interior bulkheads, exclusive of masts, rigging, deck and equipment. Example. A fiberglass hull as pulled from a mold.
--
A wooden hull:
one constructed of wood (including plywood).

A glass hull:
one constructed of reinforced plastic (cloth impregnated with resin). Nominally referred to as a fiberglass hull.
one constructed of reinforced plastic (cloth impregnated with resin). Nominally referred to as a fiberglass hull.
--
A composite hull:
a hull constructed of wood and covered with reinforced plastic (cloth impregnated with resin).
 OR:
OR:
a hull constructed using a laminate (sandwich) consisting of reinforced plastic (cloth impregnated with resin) on two sides of a core . Core materials may be foam or wood.
a hull constructed of wood and covered with reinforced plastic (cloth impregnated with resin).
 OR:
OR:a hull constructed using a laminate (sandwich) consisting of reinforced plastic (cloth impregnated with resin) on two sides of a core . Core materials may be foam or wood.
Steps toward building a sailing model
Building Displaying Sailing
Model Boats and Ships
So you want to build a sailing model
Find plans for a sailing model, buy or find on-line.
Join a model boat forum for advice.
Buy or borrow books on boat building.
Decide on type of planking and wood to be used to build the model.
Set aside a work space for building.
Review the bill of materials need to build the model and buy the materials.
Order deck and mast fittings.
Order mast (if you are buying the mast) and order sails (or sail material).
Choose the radio system, buy a sail control unit, Order keel bulb or get advice and discuss issues of building your own.
While the hull is under construction build:
Keel fin and ballast bulb
Rudder assembly
Make or assemble spars ( mast and booms)
Build cradle to hold boat under construction and when finished.
Test Radio System and sail control unit
After hull is planked:
Install keel trunk or make provisions for mounting keel.
Install radio and sail control unit, Then remove while construction continues.
Construct deck and hatches
Install/mount deck fittings
Test access to radio and sail control inside the hull.
Provide a exit guide for radio antenna so it can be attached to mast or stays.
Install power switch for turning off batteries
Test mount keel
Paint hull, rudder and keel
Assemble hull, rudder and keel
Set up mast and boom.
Install radio controls.
Check running rigging.
Attach Sails
dry sail model
--
Sail
Display
Storage
11/06/2015
Star construction examples.
PondYachtworks in Scottsdale, AZ.

The Star 45 is a one design class of model yachts recognized by the American Model Yacht Association. This boat is 45" long with a minumum weight of 12 pounds. The design is a semiscale model of a International Star. These boats can be scratchbuilt, from a kit or purchased complete.
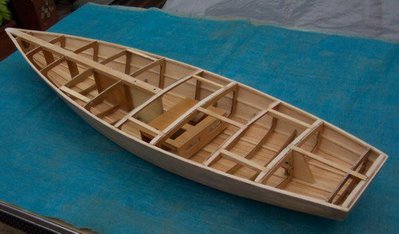
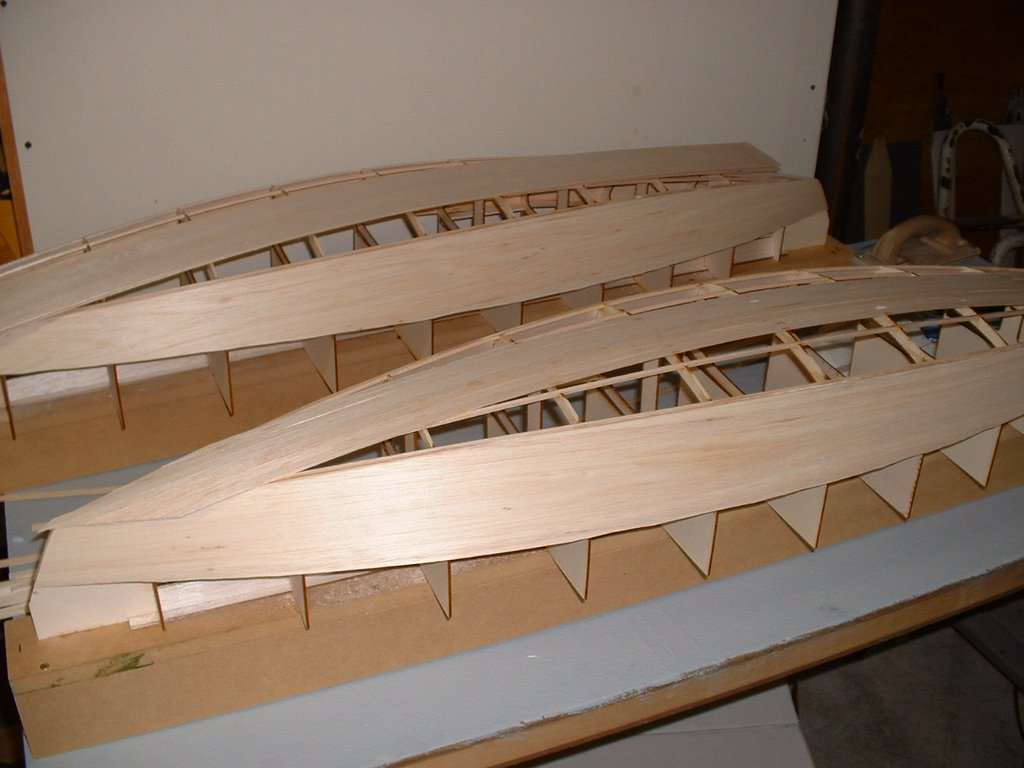
S45 Construction planking the bottom
 Photograph by John Fisher
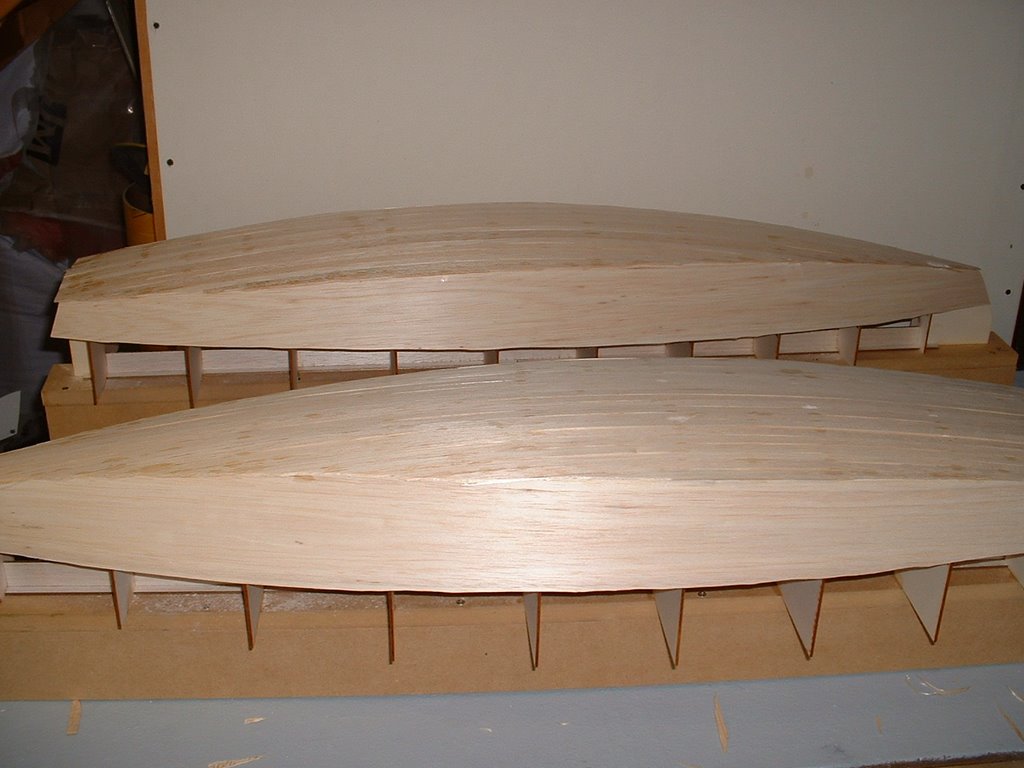
Photograph by John Fisher
Since it was requested here are a couple of photo's of planking the
bottom of my two wood/glass stars. photo 01 is the bottom of the first
star about half way done. Planks are 1/16 X 3/8 balsa. These were cut
from a 48" long sheet. Weigh your balsa before buying it. I would not
use a 3 X 48 sheet that weighed in at more than 22g. It takes 3 sheets
to cover the bottom and you could add another 1 to 1.5 oz by using
heavy balsa.
I started in the middle and worked to the outside. I sprayed the
shadows with kicker, then put down a plank, then added super fast CA to
hold it down. If the kicker was not dry enough it would cure before it
wicked into the joint which would cause the next plank to not fit
correctly. I had some variation in the planks, but once they were
glassed the bottom smoothed out quite a bit.
If I were to do another one I would add the half frames. I will be
adding them to the DXF files in the next couple of days for anyone
wishing to cut a set.
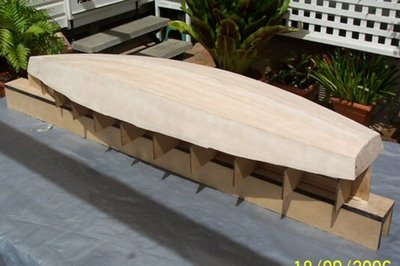
Picture shows the bottom after it was completely planked. On the
second boat I got a nice pattern on the bottom since the balsa sheets
had different grain structure. I sanded the sided flush and got the
bottom relatively smooth, but not perfect. With the balsa planks they
were flexible and if sanded too much you get thin spots at the frames.
The glass smoothed out inperfections. If doing a hard wood bottom the
planks should fit better than what I did with the balsa.
====
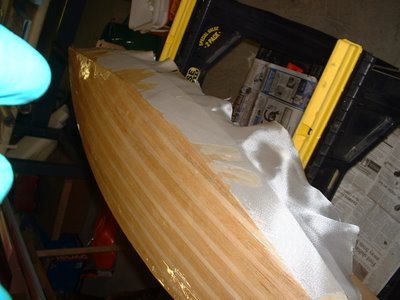
From: "John Fisher"
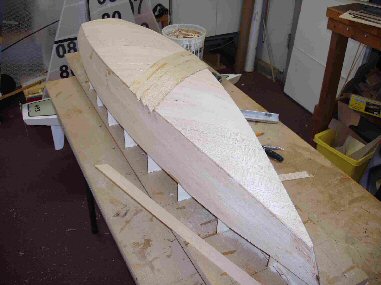
Subject: Photo's of star 45 double diagonal planked
Here are some photo's of Sherwood Jones Star 45 with double diagonal bottom planking. He used two layers of 1/16 planking. The planks are 1" wide. He then covered it with 1 ½oz glass. Weight is about the same as mine with the 1/16 longitudinal planks and two layers of 3.2 oz glass. Just goes to show that there are multiple ways to solve a problem.
[Star45] Update on planking bottom with edge glueing.
[Star45] Update on planking bottom with edge glueing.
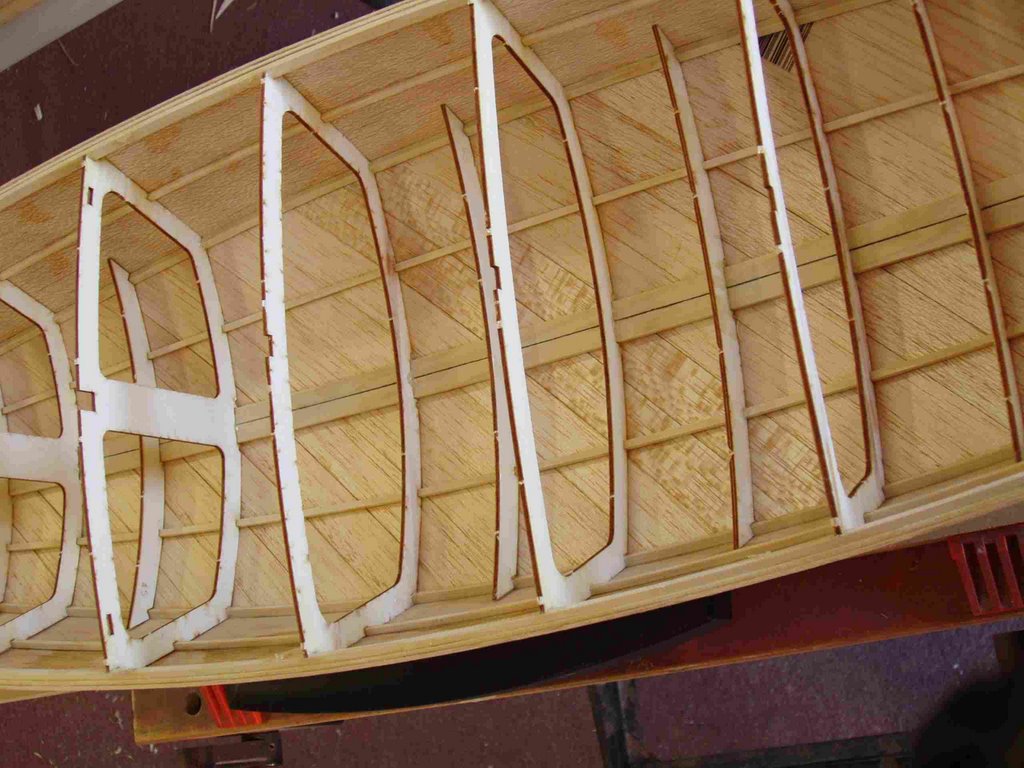
John Fisher is ready { 4/19/2007 } to glass his latest boat and is sharing how he planked it. His dad built a ply sided, cedar planked star using titebond II and it came out pretty light and stiff. With this information I started to build another hull using the same materials. He felt that edge gluing the planks added a lot of the strength to his boat. John didn't want to glue in extra wood to hold the pins to keep the planks in place for the glue to dry, so I combined two methods of planking. John liked the quickness of planking with CA and kicker, but it lacked stiffness when sanding the bottom before glassing. So he decided to edge glue the planks and then tack them in place to the frames with CA.
In this photo you can see where John put drops of CA on the planks. The wood is slightly darker.

It worked well. John has an edge glued bottom and he was able to plank it in one evening. To do this John first spray the frames with kicker, then apply titebond III to the edge of the planks. He then would hold the plank in place, tight against the previous plank, and apply a drop of CA to each frame to hold it in place. It did not matter where John started, bow, stern, or middle, but do make sure the CA has set up before moving to the next frame. Once the whole plank was in place he came back and wiped off the extra titebond. To fair the bottom to the sides he used a $10, 6" plane from home depot set at .010" depth of cut. It quickly removed the cedar and a little sanding finished the job.
John had one plank that was too thin that he had to remove, it was harder than expected. He had the use quite a bit of force to break the glue joint at each frame, so he is confident that this method is strong. John will also use this for balsa planked bottoms.
In photo # 10 you can see the stern still needs to be trimmed and sanded. John will probably use a saw to trim in close and then sand to fair it.

Subscribe to:
Posts (Atom)