Search This Blog

11/01/2008

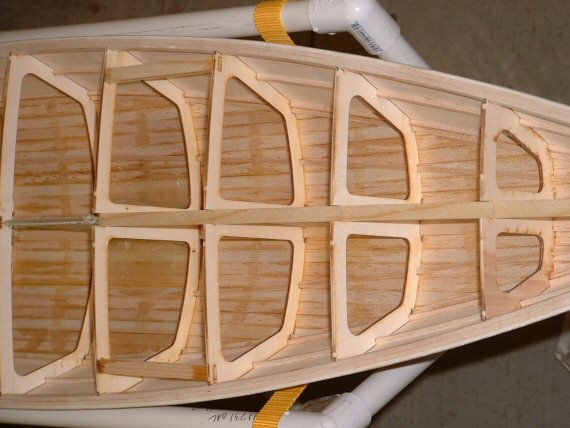
Jonesport model under construction, , 42 inch glass hull


42in_lb_model_10.jpg
Posted by target='ext'>Hello

42in_lb_model_03.jpg
Posted by Hello

Dave Mainwaring, 42 inch model under construction

Fibre Glast Developments _ Estimating Materials

The Fundamentals of Fiberglass - Fibre Glast Developments: "Worksheet For Estimating Materials

1) Begin by calculating the surface area of the project. Estimate irregular shapes by measuring the approximate sized rectangles necessary to contain the tapered areas. Multiply the length times the width for each rectangle, and then add all of individual rectangles together to get the total surface area of the part. If the calculation is in square feet, divide by 9 to get square yards.

2) Make a list of each type of reinforcement being considered for the lamination. Multiply the square yards calculated above times the ounce weight of the fabric. This is the total weight of one layer of that material. It is also the amount of resin required to saturate it. When this is known for two or three different types of materials, it is possible to calculate the weight and cost of a laminate constructed from any combination of these fabrics. To convert the ounce weight to pounds, divide by 16. Those inexperienced in saturating fiberglass tend to use far too much resin. A well saturated laminate is uniformly translucent, without milky appearing dry spots, but for the sake of weight and cost, has little excess resin in it."

The Fundamentals of Fiberglass - Fibre Glass Developments

The Fundamentals of Fiberglass - Fibre Glass Developments: "Estimating Material Weights And Cost

Accurate material estimates are necessary for two reasons.First, they obviously are needed for proper ordering, material stocking, and bidding of projects. More importantly though, estimates offer the opportunity to calculate the weight or cost of the part using a variety of laminating schedules before beginning to build.

Unlike estimating coverage when painting, resin usage will vary depending on the type of reinforcement being used. The heavier the fabric, the more resin it will take to wet it out. A good hand laminate consists of about 50% fabric and 50% resin by weight. For example, if an application requires 3 sq yds of a 4 oz/sq yd fabric (total fabric weight = 12 ounces), 12 oz of resin will also be needed. However, if 3 yards of 10 oz/sq yd fabric is chosen (total fabric weight = 30 ounces), 30 oz. of resin will be needed.

Glass mat requires a minimum of 2 ounces of resin for each ounce of mat. Therefore, it the application calls for 20 sq feet of 1-1/2 oz/sq ft mat, it will require a minimum of 60 ounces of resin. Remember that mat is specified in ounces per square foot, where fabrics are specified in ounces per square yard. 1-1/2 oz/ sq ft chopped mat actually weighs 13.5 oz/ sq yd!

Since there are so many possible combinations of materials, one should calculate the weight and cost of a single layer using a variety of reinforcements. These can then be added or subtracted form the theoretical laminate until the design properties are achieved."

10/16/2008

Thinning Epoxy

Thinning West System Epoxy by Brian Knight
http://www.seqair.com/skunkworks/Glues/WestSystem/Thinning/Thinning.html

"This article appeared in the Fall 1999 issue of Epoxyworks, published by Gougeon Brothers, manufacturers of the West System epoxies." Brian Knight thanks Gougeon for permission to publish this in the December 1999 Falco Builders Letter. "

Here are key excerpts for your review and discussion:

"With wood, the best method of thinning epoxy with heat is to warm the wood and have the resin and hardener at room temperature. Mix the components and apply the mixture to the warm wood surface. Remove the heat source just before the epoxy is applied. When the epoxy mixture comes in contact with the warm wood, it gets warm and its viscosity becomes lower. As the temperature of the wood falls, the thin epoxy is drawn in deeply before it begins to gel. By heating the substrate instead of the components, you get the best of both worlds-low viscosity epoxy on the work surface and longer working time in the mixing pot."

Thinning epoxy with solvent
Adding solvent is a quick, simple method of thinning epoxy, but unlike using heat to thin it, the strength and moisture resistance of the cured epoxy are drastically affected. Below are some of the effects adding solvent has on West System epoxy. While there are a large number of chemicals available to thin epoxy, we selected acetone, lacquer thinner and denatured alcohol for this discussion because they are commonly available and do a good job of reducing viscosity. Additionally, these solvents evaporate quickly and are less likely to be trapped in the cured epoxy-an important characteristic. For a variety of reasons, fast evaporating lacquer thinner appears to be more appropriate for thinning purposes than acetone or alcohol.

10/15/2008

So you want to build a sailing model

Find plans for a sailing model, buy or find on-line.

Join a model boat forum for advice.

Buy or borrow books on boat building.

Decide on type of planking and wood to be used to build the model.

Set aside a work space for building.

Review the bill of materials need to build the model and buy the materials.

Order deck and mast fittings.

Order mast (if you are buying the mast) and order sails (or sail material).

Choose the radio system, buy a sail control unit, Order keel bulb or get advice and discuss issues of building your own.

While the hull is under construction build:

Keel fin and ballast bulb

Rudder assembly

Make or assemble spars ( mast and booms)

Build cradle to hold boat under construction and when finished.

Test Radio System and sail control unit

After hull is planked:

Install keel trunk or make provisions for mounting keel.

Install radio and sail control unit, Then remove while construction continues.

Construct deck and hatches

Install/mount deck fittings

Test access to radio and sail control inside the hull.

Provide a exit guide for radio antenna so it can be attached to mast or stays.

Install power switch for turning off batteries

Test mount keel

Paint hull, rudder and keel

Assemble hull, rudder and keel

Set up mast and boom.

Install radio controls.

Check running rigging.

Attach Sails

dry sail model

--

Sail
Display
Storage
Model Sailboat Plans on line


Most browsers will allow you to right click and open the jpg images. You can then save them to your machine.

This set of plans are based on drawing from John Fisher 2006. John may have new and updated drawings available. Check with http://groups.yahoo.com/search?query=star45 membership required.

I want to thank J. Herrmann, www.graphicLanguageOnline.com, for his assistance in converting pdf's to jpg drawing, adding color to the templates and adding the grid to the final images

You can print these drawing to many different sizes.They are not necessarily to scale.

Inside a R/C sailing model hull

John Fisher photographer and builder!
Radio Board stringers between bulkheads
(Note the method of keel support using these stringers)
radiobd_1sml.2.jpg


Radio Board
radiobd_2sml.1.jpg


Rudder Servo
servo_sml.2.jpg


Mast support (inside hull)


internal mast support